
The instructions below can be followed to set up Faculty Office Hour availability for students to meet by Appointment only. It is recommended to set up separate blocks of availability if you would like to have Faculty Office Hours by both Appointment and Drop In.
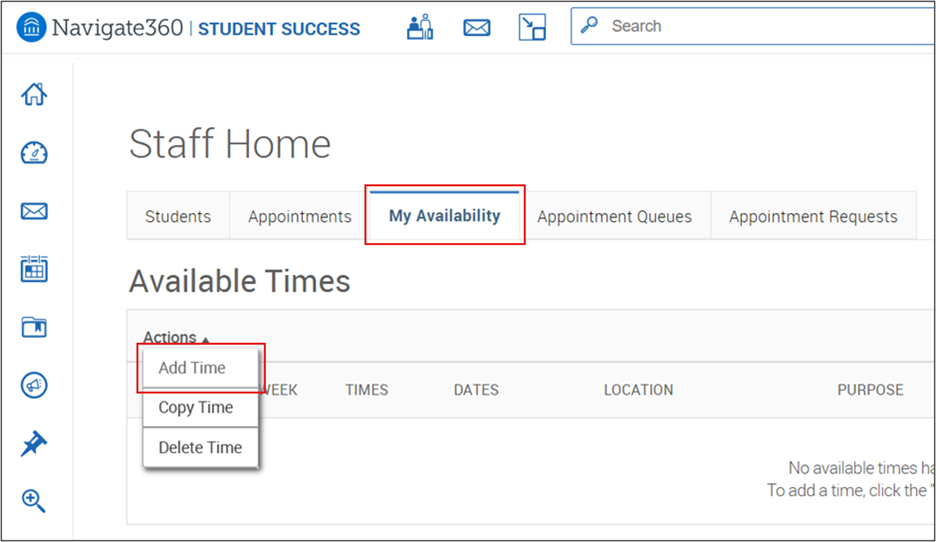
Log into Pathways and choose the My Availability tab on your Staff Home page. Under Available Times, use the Actions button to Add Time.
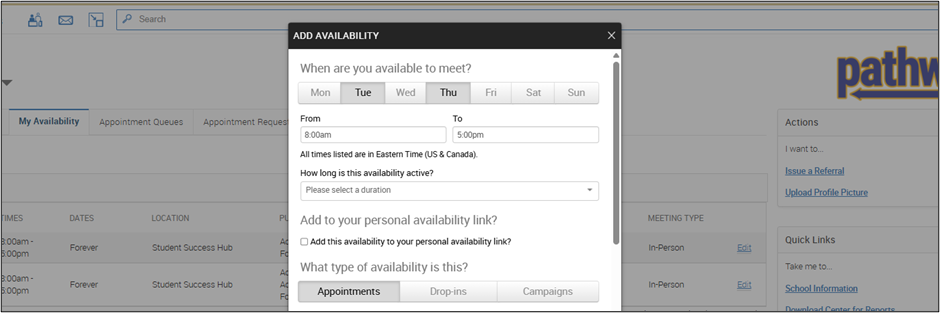
In the box that pops up, select the days and times you are available. To set the same availability for the entire term, choose the current term (Default Term) for the length of time to be active.* Then choose the Appointments option. (You’ll be able to add additional days and times in a later step.)
*Note: if you choose Forever, then your availability will continue during and in between terms, as well as summer.
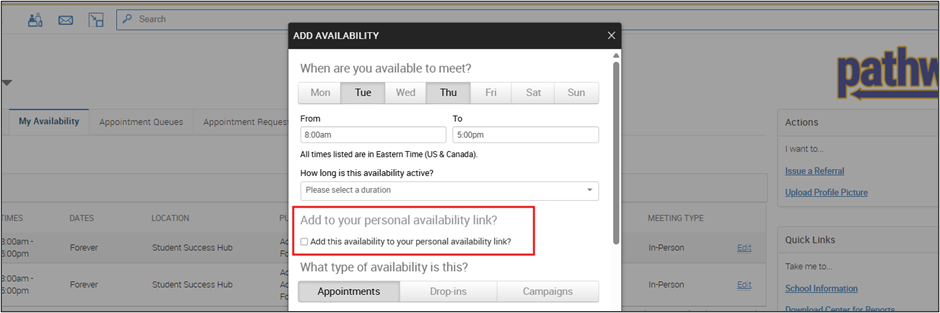
If you would like to create a link that can be posted on Canvas or that you can send to your students that will direct them to view your drop-in times, select the box to Add to your personal availability link, as seen below:
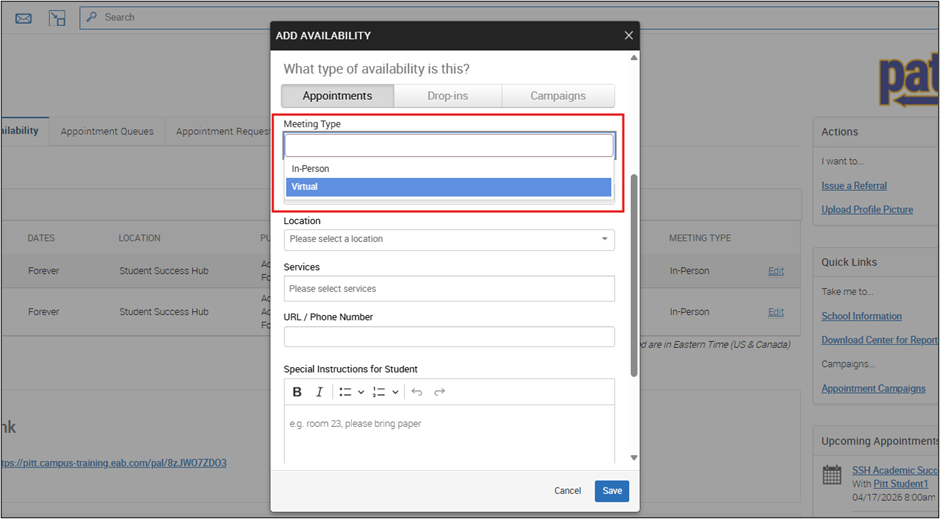
Select the type of meeting (In-person and/or Virtual). It is recommended to only choose one type to avoid having both in-person and virtual appointments at the same time.
Make the following selections from the Care Unit, Location and Services drop-down menus:
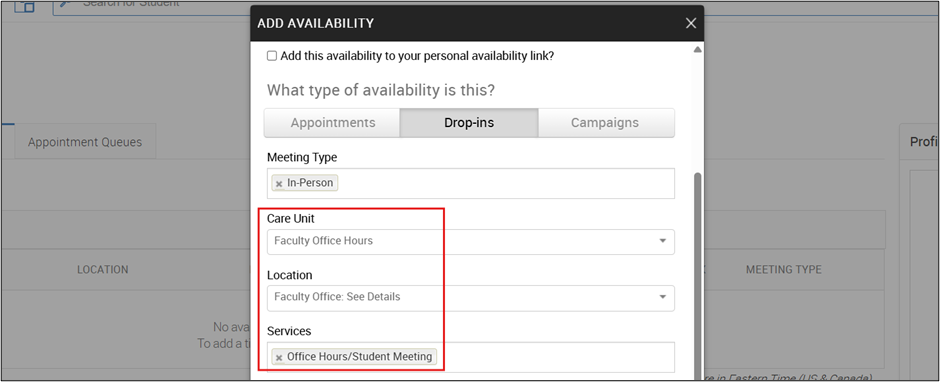
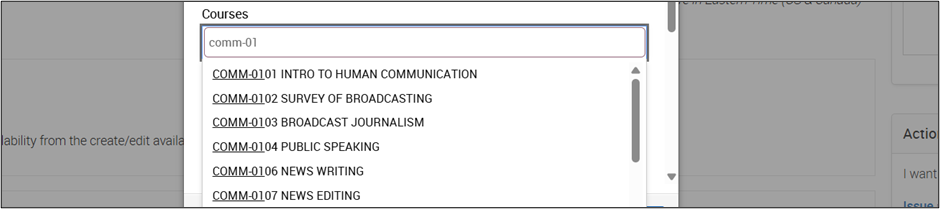
Add the course that you are teaching this semester. Begin typing the subject and catalog number, including the hyphen. The course you select needs to be the exact SUBJECT and 4-DIGIT CATALOG NUMBER as listed in PeopleSoft or your students will not be able to see your drop-in availability. It is recommended to set up separate availability for each course you teach.
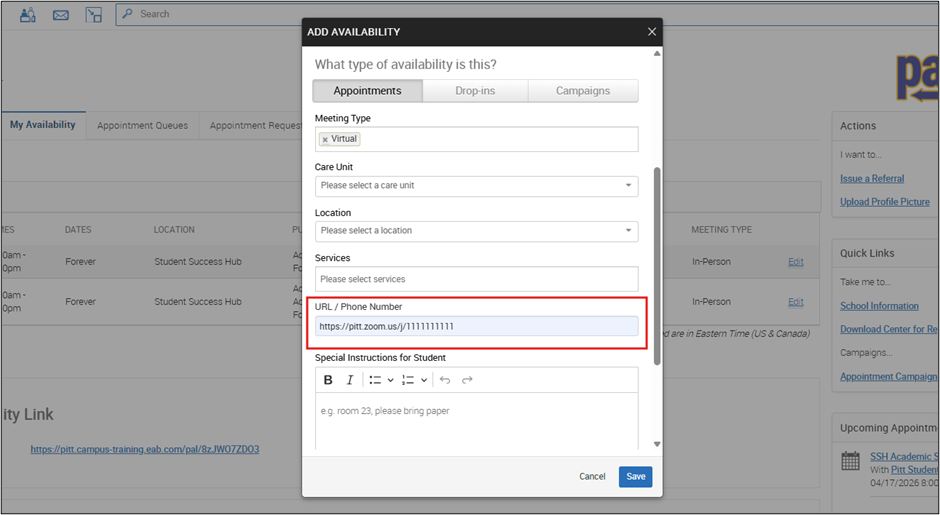
If you select Virtual meeting type, you can add a URL, such as your Zoom Personal Meeting ID (PMI) or phone number. This information will be sent to the student when they schedule the appointment.
Add any Special Instructions you would like the students to see when they view your drop-in availability. The sample text you see here is included below in the Tip section if you would like to copy.
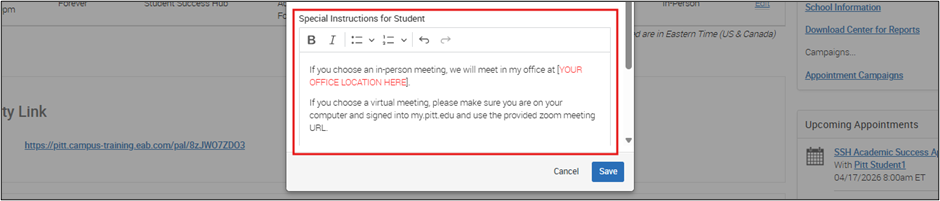
Tip: Include special instructions to provide the students with important information. You can also choose to add your specific course to this information as well so that students know that these office hours are only available to those enrolled in the specific course this availability is tied to.
If you choose an in-person meeting, we will meet in my office at [YOUR OFFICE LOCATION HERE].
If you choose a virtual meeting, please make sure you are on your computer and signed into my.pitt.edu and use the provided Zoom meeting URL.
It is recommended to increase the Max Number of Students per Appointment to 2, and to check the box to Limit to One Course per Appointment.
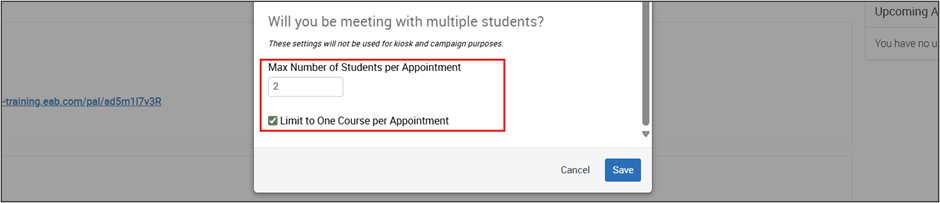
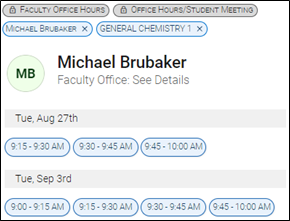
Note: By default, when students schedule an appointment, they are scheduling for a 15-minute meeting (see image below). When you increase the Max number of students per appointment to “2” it means that you could have 2 students schedule in the same 15-minute window.
In this example, there were already 2 students who scheduled separately for the 9:00-9:15 AM meeting, so now students are only shown 3 appointment options for Aug 27th.
Click the Save button.

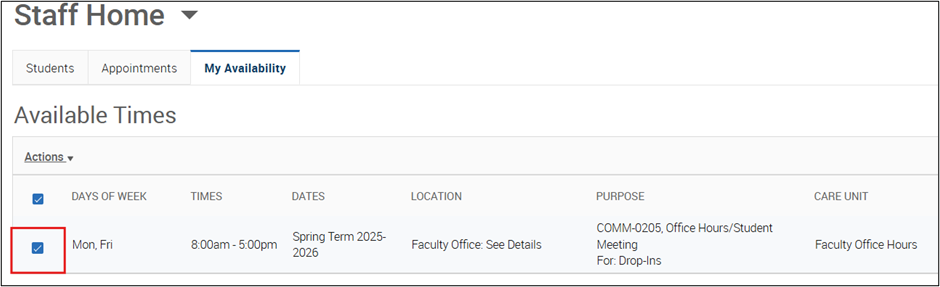
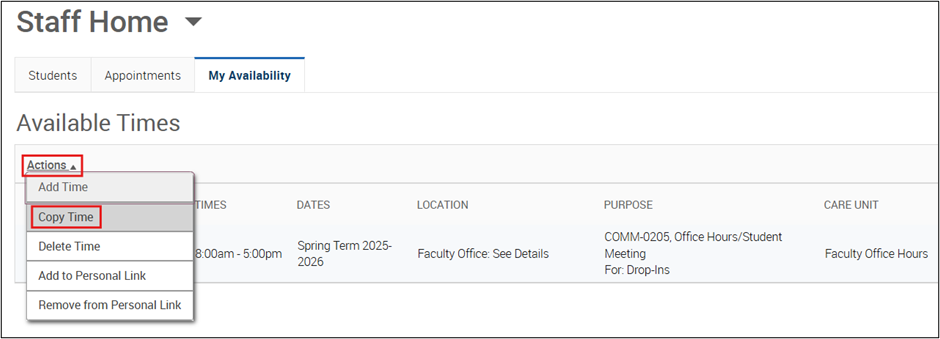
To add additional availabilities, select the checkbox beside the time you have created, and use the Actions drop-down to Copy this time. You can also use the blue Edit link to edit a specific block. You can have as much availability as you need.
Note: If you teach more than one class you will need to create separate availability for each class.