
Appointment Scheduling Documentation
Advisors and mentors can manually schedule, edit or cancel appointments with students. This documentation shows how to do this within the platform.
Note that you may not be able to edit or cancel appointments if you are not the organizer of the appointment or if you do not have access to manage appointments in the specific Care Unit that the appointment is scheduled in.
Schedule an Appointment from the Student’s Page
From the student’s page, select the Schedule an Appointment link from the Options container.
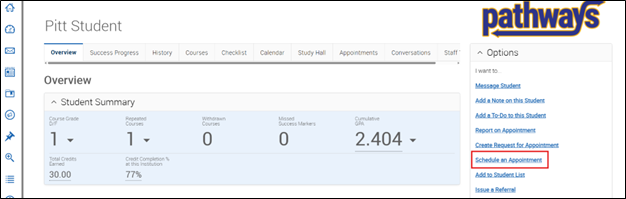
Then follow steps on the next section to select the Appointment Scheduling Options.
Schedule an Appointment from Your Assigned Student List, or an Advanced Search or Report
Select the student(s) you would like to schedule an appointment for and using the Actions drop down menu, select the Schedule Appointment option.
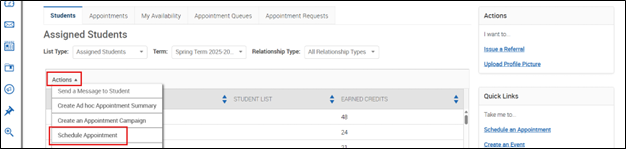

Then follow steps in the next section to select the Appointment Scheduling Options.
Appointment Scheduling Options
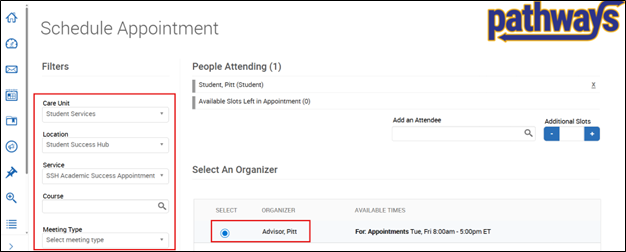
Select the Care Unit, Location, Service and Meeting Type for the appointment. And select the Radio Button beside the organizer’s name.
Next, add any Comments. Use the Calendar to Select a Date. Then Select the checkbox for the specific block of time for the appointment.
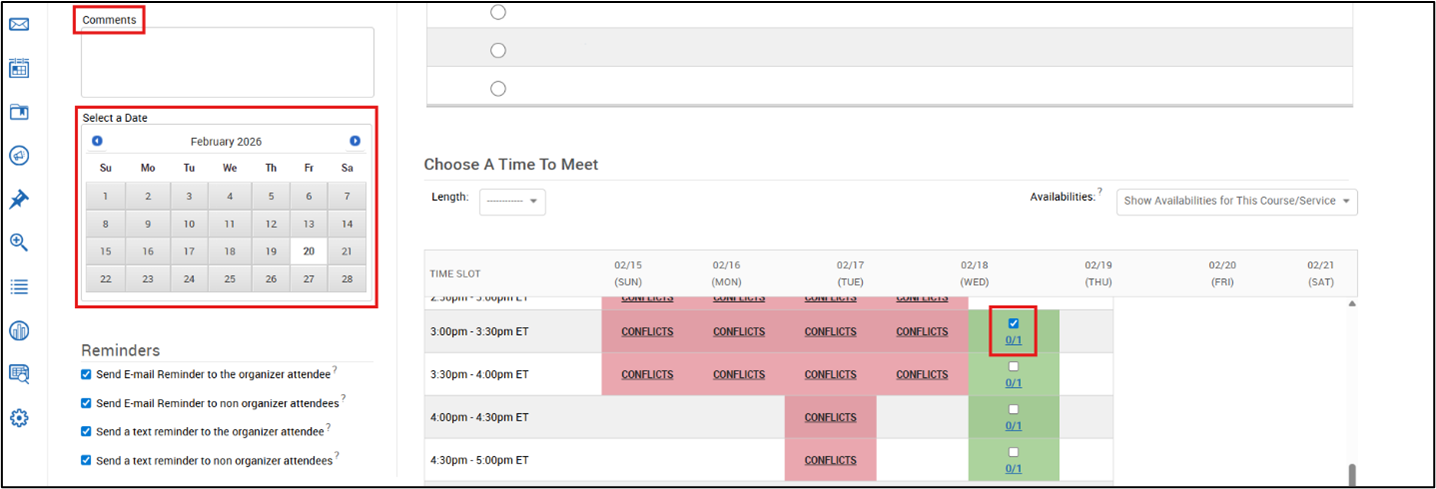
Use the Availabilities dropdown menu to see additional options if default times do not display any checkboxes and available time.

If the appointment is a reoccurring appointment, select the appropriate options Repeating Appointment options. Next, press the blue Save Appointment button.

You and the student will receive the relevant Appointment Notification emails, confirming the details of the appointment that you scheduled.