
An Appointment Summary is used to document a meeting that you had with a student.
For appointments scheduled in the platform, you can complete the associated Appointment Summary.
And Ad-hoc Appointment Summaries can be created to document a meeting that you had with a student that was not scheduled in the platform.
Jump to:
- Parts of an Appointment Summary
- Completing an Appointment Summary from the Appointments Tab (for an Appointment that was Scheduled in Pathways
- Completing an Appointment Summary from a Front Desk Check In (for Drop in Appointments and Locations that Use a Kiosk or Virtual Check In)
- Creating an Ad hoc Appointment Summary (For a Student Meeting Not Scheduled in Pathways)
- From the Student's Page
- From Your Assigned Student List or an Advanced Search or Report
Downloadable version: How to Create Appointment Summaries (PDF)
Parts of an Appointment Summary
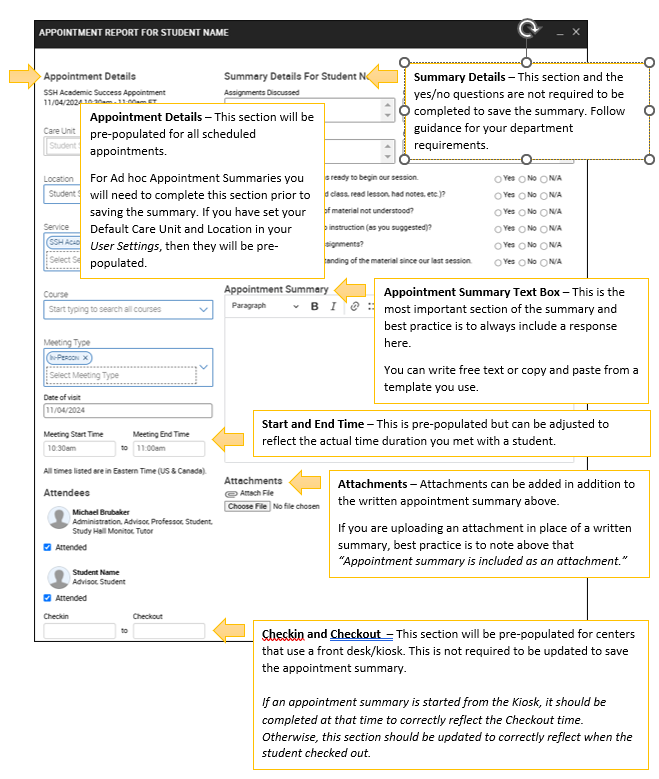
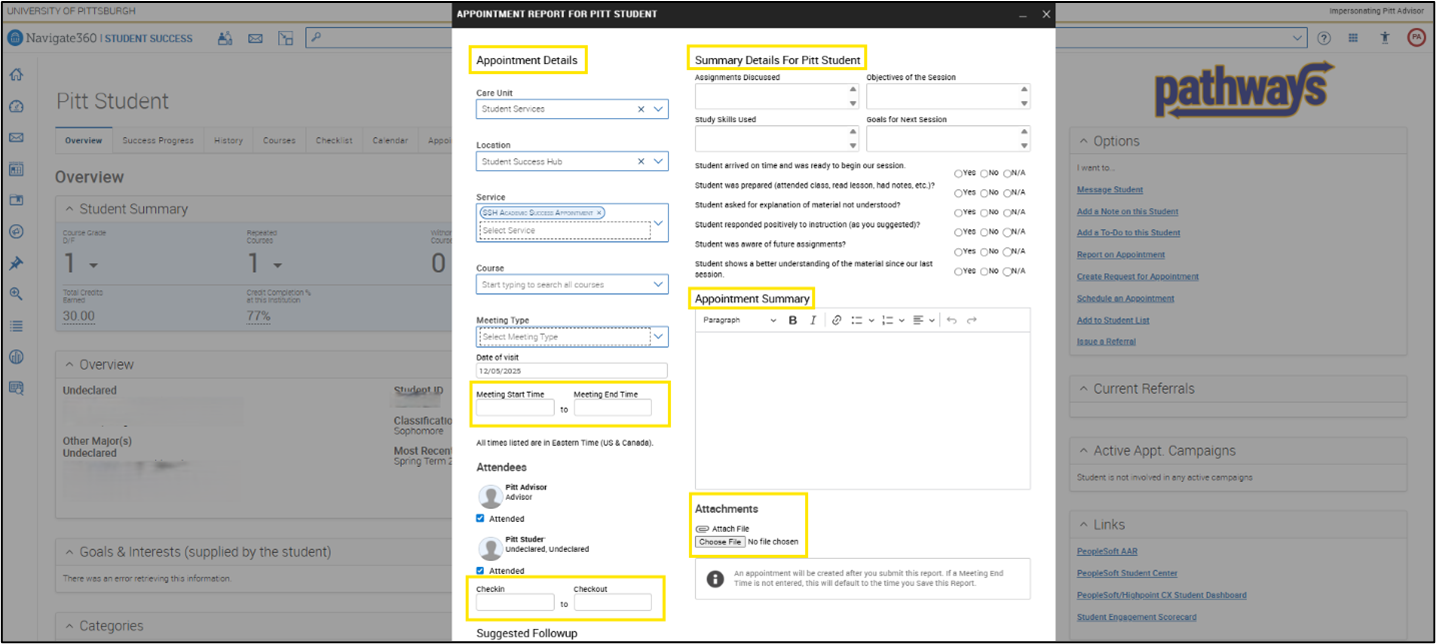
- Appointment Details – This section will be pre-populated for all scheduled appointments.
- For Ad hoc Appointment Summaries you will need to complete this section prior to saving the summary. If you have set your Default Care Unit and Location in your User Settings, then they will be pre-populated.
- Summary Details – This section and the yes/no questions are not required to be completed to save the summary. Follow guidance from your department requirements.
- Appointment Summary Text Box – This is the most important section of the summary and best practice is to always include a response here.
- You can write free text or copy and paste from a template you use.
- Start and End Time – This is pre-populated but can be adjusted to reflect the actual time duration you met with a student.
- Attachments – Attachments can be added in addition to the written appointment summary above.
- If you are uploading an attachment in place of a written summary, best practice is to note in the text box that “Appointment summary is included as an attachment.”
- Checkin and Checkout – This section will be pre-populated for centers that use a front desk/kiosk. This is not required to be updated to save the appointment summary.
If an appointment summary is started from the Kiosk, it should be completed at that time to correctly reflect the Checkout time. Otherwise, this section should be updated to correctly reflect when the student checked out.
Completing an Appointment Summary from the Appointments Tab
(for an Appointment that was Scheduled in Pathways)
Select the Appointments Tab from your Staff Home page.

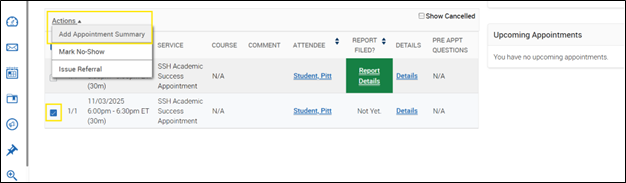
Scroll down to the Recent Appointments section. Select the checkbox beside the student appointment you would like to create the summary for. Using the Actions drop down button, select Add Appointment Summary.
Complete the Appointment Summary following your department guidelines. See the Parts of an Appointment Summary section for more details.
Completing an Appointment Summary from Front Desk Check In
(for Drop in Appointments and Locations that Use a Kiosk or Virtual Check In)
When your student checks in for their appointment, you will be notified at the top of your screen. Click this notification to see the student who has checked in and to start the appointment.

You will receive a notification at the bottom of the screen that the student has left the waitlist, and the associated Appointment Summary popup will be available to complete the appointment summary.
The student will be checked when you complete and save the report.
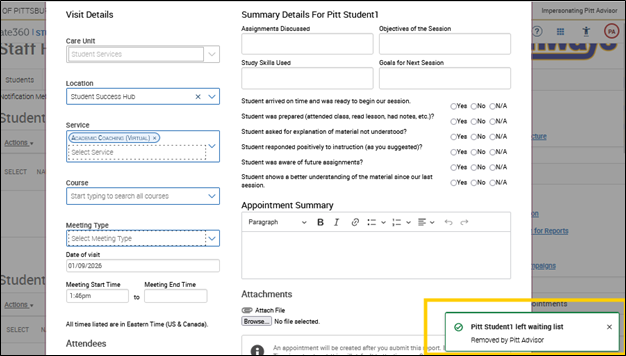
If you need to edit the Checkout Time, select the green Report Details link to Edit the report.

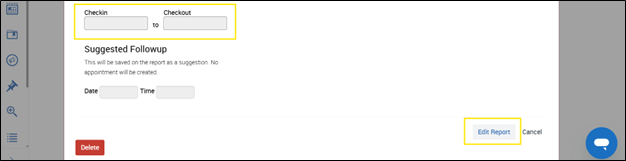
Complete the Appointment Summary following your department guidelines. See the Parts of an Appointment Summary section for more details.
Creating an Ad hoc Appointment Summary (For a Student Meeting Not Scheduled in Pathways)
When an Ad hoc Summary is created, an associated Appointment is also created and added to both you and your student’s schedule. The student does not receive any notification about this appointment or that a summary was created, but they will be able to see the appointment on their calendar if they look.
FROM THE STUDENT’S PAGE
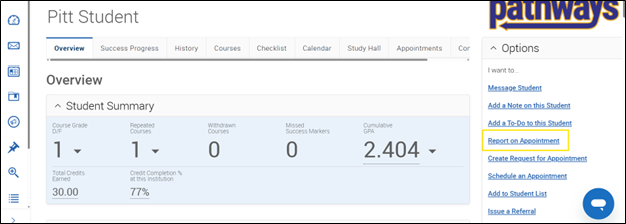
From the student’s page, select the Report on Appointment link from the Options container.
FROM YOUR ASSIGNED STUDENT LIST, OR AN ADVANCED SEARCH OR REPORT
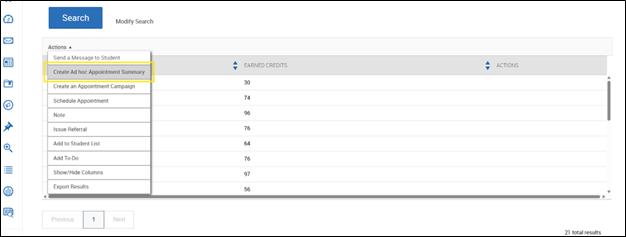
Select the student you would like to create an appointment summary for and using the Actions drop down menu, select the Create Ad hoc Appointment Summary option.
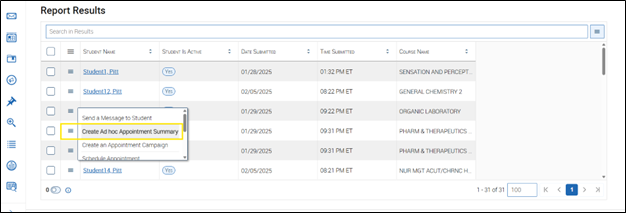
Because ad hoc appointment summaries also create an associated appointment, be sure to adjust the Date, Start Time and End Time to accurately reflect the approximate details of the meeting.
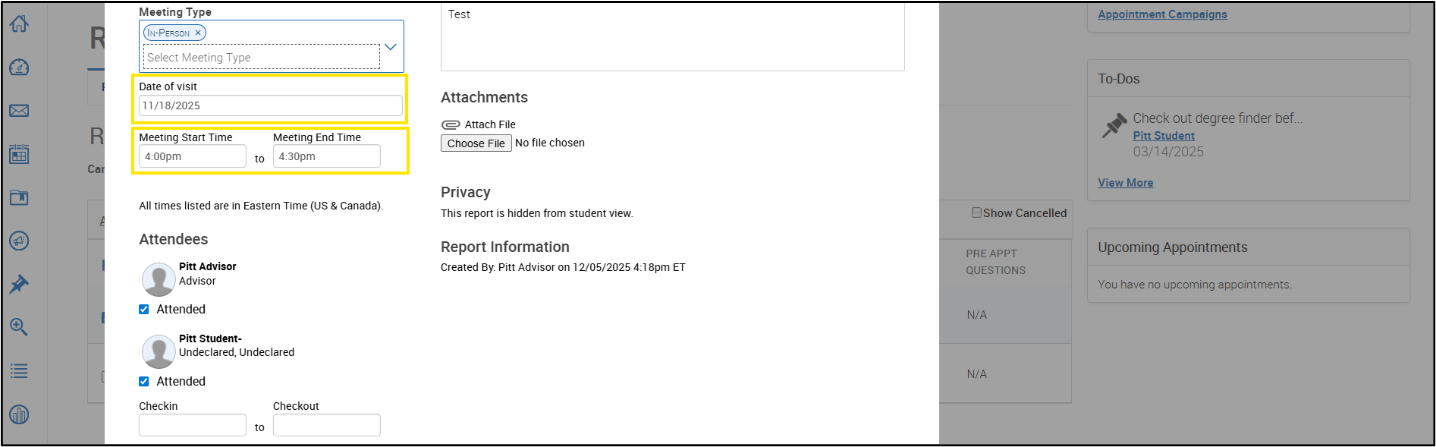
Complete the Appointment Summary following your department guidelines. See the Parts of an Appointment Summary section for more details.